
Understanding Essential Plastic Molding Machine Components
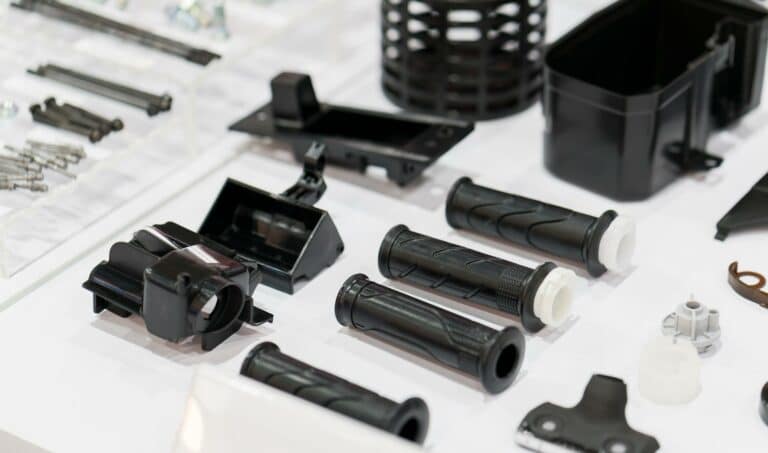
Plastic molding machines are integral to modern manufacturing, converting raw plastic into finished products using a combination of heat, pressure, and motion. They facilitate the
DISCOVER OUR NEWLY RELEASED COLLECTIBLE DISPLAY CASES! SHOP NOW
Shop by brand & type
UV-filtering display cases that guard collectibles, documents, and retail goods against sun damage and discoloration.
Browse UV-protected cases →Display cases packaged for retail shelves — clamshell, boxed, and custom-printed options ready to scan and sell.
Browse retail-ready cases →
Moving a plastic part from an idea to a shelf usually runs through two very different processes. Prototype injection molding exists to test and refine a design cheaply, while production injection molding exists to make the same part thousands or millions of times with consistent quality. Knowing where one ends and the other begins is what keeps a project on budget and on schedule.
Prototype injection molding produces a small number of parts from a low-cost, quick-to-build mold so a design can be tested and refined before committing to production tooling. It is used in the early stages of product development to validate ideas, catch design flaws, and make changes while they are still inexpensive to make. This minimizes risk and smooths the transition to full production.
Prototype molding is used where design precision and early testing matter most:
Production injection molding uses durable, high-precision tooling to make high volumes of identical parts with consistent quality. It relies on robust mold materials such as hardened steel that are engineered to withstand long, repeated runs. Where prototyping prioritizes testing and change, production molding prioritizes efficiency, repeatability, and cost per unit at scale.
Production molding suits industries and use cases that need volume and reliability:
The difference between prototype and production injection molding comes down to five things: cost, material, timeline, design flexibility, and manufacturing goal. Prototype tooling is cheaper, faster, and easy to change but short-lived; production tooling is a larger, slower investment built to run at volume. The table below consolidates how the choice usually maps to volume, from the first prototype to full production.
| Stage and volume | Best method | Tooling material | Typical mold life | Relative lead time | Relative upfront cost |
|---|---|---|---|---|---|
| Concept and early design, lowest volume, geometry still changing | 3D printing (SLA or FDM) | No hard tooling | Not applicable | Fastest | Lowest |
| Functional and pilot testing, low to moderate volume, design stabilizing | Prototype injection molding | Aluminum prototype tool | Thousands of parts; modern hard-aluminum tooling can reach 100,000 or more with proper maintenance | Fast | Low to moderate |
| Bridge and extended validation, moderate to higher volume | Bridge injection molding | Soft or pre-hardened (P20) steel | Higher than aluminum, below full-production tooling | Moderate | Moderate |
| Full production, highest volume, design locked | Production injection molding | Hardened steel | Hundreds of thousands to well over a million parts | Longest | Highest |
Where the crossover falls: depends on the part: 3D printing can be the lower-cost path well into the hundreds, up to around 1,000 units for some parts, and the economics tip toward molding once a run climbs high enough that amortized tooling drives per-part cost down and molded parts match production material properties. Tooling is often the single largest upfront cost in a molding project, and because a mold costs about the same whether it makes one part or a hundred thousand, per-part tooling cost falls as volume rises.
Reading the table from top to bottom is the decision itself. 3D printing covers concept and early design, when the geometry is still moving, covering anywhere from a handful of parts up to around 1,000 depending on the part. An aluminum prototype tool takes over once the design is stabilizing and you need functional parts in production-grade resin. Bridge tooling, usually soft or pre-hardened P20 steel, fills the gap between prototype and full production: it runs larger validation and early-market quantities while a design proves out demand, without the cost or lead time of a hardened production tool. Hardened steel is reserved for locked, high-volume designs. Most programs walk these stages in order, stepping up in tooling durability only as volume and confidence grow.
Start with 3D printing when the geometry is still changing and you need anywhere from a handful of parts up to around 1,000 depending on the part; move to a prototype injection mold once the design is stabilizing and you need functional parts in production-grade resin. 3D printing needs no tooling, so it is the fastest and cheapest way to hold a physical part in your hand, but the material properties are not identical to a molded production part. A prototype mold costs more upfront, yet it produces parts in the same resin family you will run in production, which is what makes functional and regulatory testing meaningful.
The deciding factor is usually volume and how settled the design is. For a deeper side-by-side, see 3D printing vs custom injection molding. Soft and rapid tooling also carry a real speed and cost advantage at this stage. In one peer-reviewed study of rapid tooling for metal injection molding, an aluminum-filled-epoxy tool cut mold fabrication cost and time by about 30 percent each versus a conventionally machined steel mold, which illustrates why early validation favors lighter tooling over jumping straight to production steel.
This is where a single-source molder changes the math. Pioneer Plastics runs 3D printing, aluminum tooling, and full production molding under one 100,000 square foot USA roof, so a design does not change hands between a print shop, a toolmaker, and a production molder as it scales. As a veteran-owned, family-owned manufacturer that has produced parts in the USA for over 40 years, is ISO 9001:2015 certified, and holds CAGE Code 3U4K8 for government and defense work, Pioneer Plastics can carry a part from first prototype to full production.
Both prototype and production molding continue to improve through new tooling, materials, and automation. These advances shorten development cycles and raise precision at every stage.
Choose prototype molding when the goal is to test, refine, and validate a design at low volume, and choose production molding when the design is locked and you need efficient, consistent output at scale. In practice, most programs use both in sequence. Weigh four factors: project goal, budget, timeline, and volume.
The most effective strategy often combines both. Starting with design-for-manufacturing guidance and prototype molding lets a team test and refine early, then transition to production tooling once the design is validated. The benefits of this dual approach:
One practical handoff pitfall is worth planning for: aluminum prototype molds move heat quickly and can hide sink or warp that later appears in slower-cooling steel production molds. Revisiting draft angles and cooling when the design moves to a longer production run keeps quality consistent across the transition.
Custom injection molding is the link between prototyping and full production. By combining the strengths of both, it lets a design move from validation to volume with consistent quality, precision, and flexibility.
Pioneer Plastics delivers custom injection molding across the full range, from low-volume runs to high-volume production, for a wide set of industries.
With over 40 years of experience under current ownership, Pioneer Plastics has honed the craft of turning ideas into finished parts, with more than 200 years of combined engineering experience on the team. From concept development to full-scale production, the process is managed under one roof.
Prototype injection molding makes a small number of parts from a low-cost, quick-to-build mold so a design can be tested and refined before production tooling is committed. It validates form, fit, and function in real material and reduces the risk of expensive changes later.
Prototype molding is built for cheap, fast, low-volume iteration, usually with aluminum tooling. Production molding is built for high-volume, repeatable output with durable hardened-steel tooling. The first optimizes for change and speed; the second optimizes for consistency and cost per unit at scale.
3D printing can stay cheaper well into the hundreds, up to around 1,000 parts for some parts, and injection molding typically becomes the lower per-part cost as a run grows and the fixed tooling cost is amortized across more parts. The exact crossover depends on the part, its size, complexity, and tooling choice, so treat any single number as a rule of thumb rather than a hard threshold.
Most prototype molds are made from aluminum because it machines faster and costs less than steel. Aluminum suits low-to-moderate volumes; modern hard aluminum can reach 100,000 or more parts with proper maintenance, while hardened steel is reserved for high-volume production tooling.
Validate the design at low volume, confirm the annual volume you actually need, then build production tooling sized to that volume. Plan for the physics to shift: aluminum prototype molds cool faster than steel, so revisit draft, wall thickness, and cooling when moving to a production tool to avoid sink and warp.
Understanding the difference between prototype and production injection molding is what keeps a product on budget as it scales. Prototyping validates a design cheaply; production molding delivers it at volume. Used in sequence, they take an idea from first part to full run with less risk.
Ready to take your concept from prototype to production? Request a quote from Pioneer Plastics and get a clear read on tooling, timeline, and fit before you commit.
The information provided in this content is for general informational purposes only and should not be considered professional advice. It is advisable to consult with a qualified industry professional before taking any action based on this information. The team at Pioneer Plastics is here to assist you with any questions you may have.
Plastic molding machines are integral to modern manufacturing, converting raw plastic into finished products using a combination of heat, pressure, and motion. They facilitate the
No two custom injection molding projects are the same, so working with someone that understands all the aspects of part design and manufacturing is important.
The custom injection molding process starts with a conceptualized design and ends with a uniquely manufactured product. If your product needs to be aesthetically pleasing