The Injection Molding Process Explained: Materials, Tooling, and When It Is the Right Choice
Choosing a manufacturing method is one of the more expensive decisions a product team makes, and it usually gets made before anyone knows enough to make it well. The injection molding process is the backbone of high-volume plastic production, but it is not the right answer for every part. This guide covers how the process works, what goes into it, what gets built before production starts, and how to tell whether your project actually fits.
Key Takeaways
The injection molding process melts plastic resin and forces it under pressure into a steel mold, where it cools into a finished part. A full cycle runs through four stages: clamping, injection, cooling, and ejection.
Injection molding earns its cost advantage at volume. Tooling is a significant investment up front, and the per-part cost only drops below the alternatives once that investment is spread across thousands of parts.
A design has to be frozen before tooling begins. Changing a part’s geometry after the mold is cut usually means cutting a new mold, which is why prototyping and design validation come first.
Resin selection drives performance. Commodity grades suit packaging and consumer goods, engineering grades handle heat, friction, and corrosion, and food contact applications require resins authorized for that use.
Two-plate molds suit simpler, durable parts. Three-plate molds add control over where plastic enters the cavity and support more complex geometries, at some cost to durability.
Low volumes, unsettled designs, and non-plastic material requirements are all legitimate reasons to choose a different process. A molder who tells you that up front is saving you money.
What Is Injection Molding?
Injection molding is a manufacturing process that produces plastic parts by melting resin and forcing it under pressure into a closed mold, where it cools and hardens into a finished shape. It is built for parts that need to be produced in identical form, at volume, to consistent tolerances. Once the mold exists, each cycle produces the same part again.
It helps to separate two terms that often get used interchangeably. Plastic molding is the umbrella category. Injection molding is one method within it, alongside processes such as blow molding, extrusion, compression molding, and thermoforming. They shape the same raw materials in different ways and suit different geometries and volumes.
What sets injection molding apart within that category is repeatability at scale. Blow molding suits hollow vessels like bottles, extrusion produces continuous profiles such as tubing and trim, and thermoforming presses a heated sheet over a form for large, shallow parts at lower quantities. Injection molding fills a closed cavity under pressure, which is what allows tight tolerances, complex internal features, and part-to-part consistency across long runs.
Is the Injection Molding Process Right for Your Part?
Injection molding fits when you need thousands of identical parts per year from a design that is finished and unlikely to change. It is the wrong choice for one-off runs, for designs still in motion, and for parts that have to be metal, glass, or another non-plastic material. The table below is the short version for choosing what makes sense.
Factor
Injection molding fits
Look at something else
Annual volume
Thousands of identical parts per year, repeated across years
A few hundred units or a one-off run
Design stability
Design is validated and frozen before tooling
Design is still changing, or will change within a year
Tooling budget
Able to absorb tooling cost up front and recover it over the run
No capital available for tooling regardless of per-unit savings
Material
A thermoplastic meets the functional requirement
The part must be metal, glass, or another non-plastic material
Tolerance and repeatability
Every part must be identical to tight tolerance
Cosmetic or prototype parts where variation is acceptable
Customization of an existing product
Ordering 50,000 units or more annually, which justifies a new mold
Below that threshold, where an existing stock size is the practical answer
When the Answer Is Honestly No
Most guides on this topic are published by companies that sell the process, so they tend to assume the answer is yes. It often is not, and three situations in particular should stop a project before tooling starts.
The volume is too low. A run of a few hundred units almost never justifies cutting a mold. The tooling cost has nowhere to amortize, and the per-part savings that make molding attractive never arrive. Machining or 3D printing will get you the parts faster and cheaper. 3D printing can also carry low-volume production on its own. Pioneer Plastics runs printed production for parts whose volumes stay too low to justify a mold.
The design is still moving. Tooling is cut to one geometry. If the part is likely to change within a year, whether for fit, function, or feedback from early customers, every change risks a new mold. Validate the design first, then tool it.
The material requirement rules out plastic. If the application demands the strength, temperature range, or optical properties of metal or glass, no resin selection will fix that. This is worth testing early rather than discovering it during sampling.
How Does the Injection Molding Process Work?
The injection molding process runs in four stages that repeat for every part produced: clamping, injection, cooling, and ejection. The full cycle is measured in seconds for small parts and in minutes for large or thick-walled ones, and cooling is usually the longest stage.
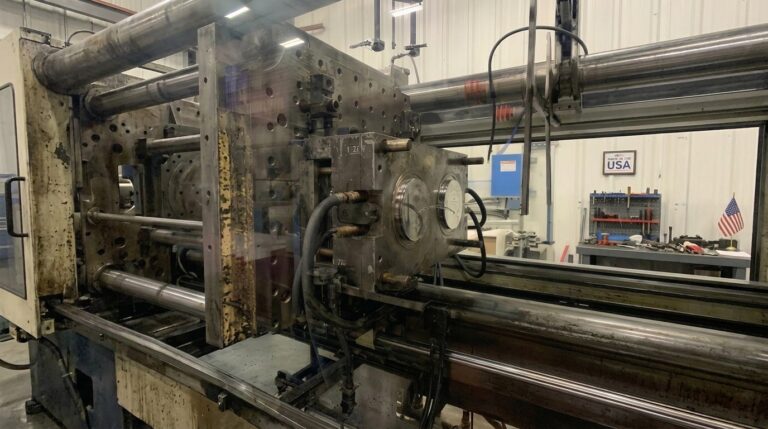
Clamping. The two halves of the mold are closed and held shut by the clamping unit. The force required scales with the size of the part, which is why machines are rated by clamp tonnage.
Injection. Plastic granules are fed from a hopper into a heated barrel, where they melt. A screw drives the molten plastic forward and injects it into the mold cavity under pressure, pressing it into every feature of the tool.
Cooling. The plastic cools and solidifies inside the cavity, taking the shape of the mold. Cooling is controlled rather than incidental, because uneven cooling causes warping and dimensional drift.
Ejection. The mold opens and the finished part is pushed clear, typically by ejector pins or a blast of air, and the cycle begins again.
Screw injection molding is the standard approach today: the rotating screw described above both melts and meters the material, and it accounts for the large majority of molded parts. One specialized variation, gas-assisted injection molding, introduces an inert gas alongside the plastic to push the melt against the cavity walls and leave the interior hollow. It is used in a small share of applications, but it helps with long or thick parts by using less material and reducing sink marks and seams.
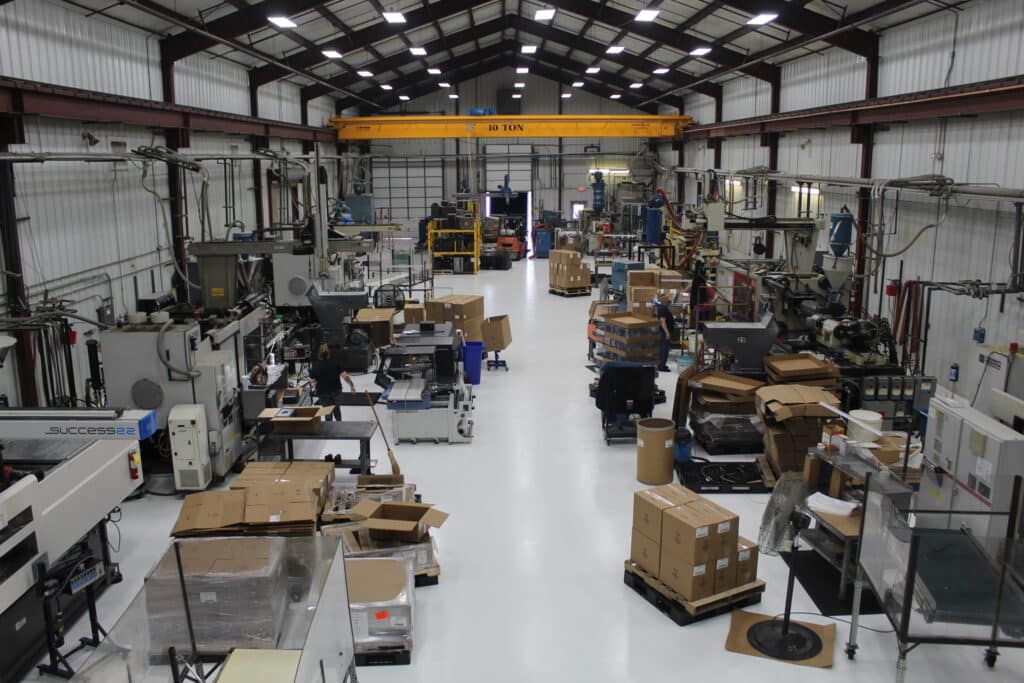
Clamp tonnage is the practical constraint on what a given shop can run, because the bigger the part, the more force is needed to hold the mold closed against injection pressure. Pioneer Plastics runs 23 modern injection molding machines ranging from 75-ton to 1200-ton clamp force at its 100,000 square foot facility in Dixon, Kentucky, which covers small precision components through large structural parts on the same floor.
Injection Molding Materials: How Resin Selection Works
Resin selection determines how a molded part performs, what it costs, and how it looks. The choice is usually made against three questions: what the part has to withstand, what it has to touch, and what volume economics will support.
Four plastics account for a large share of everyday molded parts:
Acrylonitrile Butadiene Styrene (ABS): impact-resistant and rigid, used in toys, housings, and automotive components.
Polystyrene (PS): rigid and economical, used in cutlery, cases, and clear packaging.
Acrylic: transparent and shatter-resistant, often used where glass would otherwise be specified.
Polycarbonate: heat-resistant and durable, used in eyewear, lighting, and exterior automotive parts.
The more consequential decision is grade. Commodity grades such as polyethylene, polypropylene, and polystyrene are inexpensive and suit packaging, containers, and consumer goods. Engineering grades cost more but withstand extreme temperatures, friction, and corrosion, which makes them the right call for parts under mechanical or thermal load. Specifying an engineering resin for a part that never sees stress is a common and expensive habit.
Food contact applications add a regulatory layer. Plastics that touch food are regulated by the FDA as food contact substances, with a premarket notification program and published inventories of authorized substances and their permitted conditions of use. A resin that performs well mechanically is not automatically cleared for a food application, and that needs confirming before tooling, not after.
Molds and Tooling: What Gets Built Before Production Starts
The mold is the single largest variable in an injection molding project, in both cost and lead time. Molds are cut from steel because they have to survive tens or hundreds of thousands of cycles under heat and pressure without losing dimensional accuracy. A tool and die maker builds them using lathes, mills, and CNC machining to tolerances far tighter than the parts they produce.
There are two common mold configurations, and the choice affects part complexity and tool durability:
Two-plate molds: two halves that separate along a single parting line, with the injection point at that line. They are simpler, more robust, and well suited to lower-complexity parts that need to last. Their limitation is less control over where plastic enters the cavity.
Three-plate molds: an additional plate between the two halves, which allows the injection point to be placed away from the parting line. That supports more delicate and complex geometries and cleaner gate locations, at some cost to durability given the added moving components.
Cavity count is the other tooling decision, and it is a direct cost tradeoff. A single-cavity mold is cheaper to build but makes one part per cycle, so the per-part cost is higher. A multi-cavity mold costs more to build but makes several parts per cycle, which lowers the per-part cost at volume. A single-cavity tool can also make sense as a first step for a program expected to run into the millions: an expensive but deliberate way to prove out the part before committing to production tooling.
Tooling is also where the timeline lives. The mold build is almost always the long pole in a new project, which is why a molder should commit to a timeline and specifications before work starts rather than after. Pioneer Plastics handles tool development and management with in-house engineers who act as a single point of contact through the build, backed by more than 200 years of combined engineering experience.
Injection Molding vs 3D Printing, Machining, and Metal Fabrication
Injection molding is not universally better than the alternatives. It is better at a specific job: producing many identical plastic parts to a consistent standard. Comparing it honestly against the alternatives is the fastest way to know whether it belongs in your project.
Versus 3D printing: 3D printing needs no tooling, so it wins decisively on speed and cost for prototypes, design iterations, and low-volume runs. Injection molding wins once volumes climb, because the per-part cost keeps falling while printing costs stay roughly flat per unit. The two are complements more often than competitors.
Versus machining: machining cuts parts from solid stock, which suits very low quantities, extremely tight tolerances, and materials that cannot be molded. It generates material waste and takes longer per part, so it rarely scales economically into the thousands.
Versus metal fabrication: molded plastic offers a far wider range of formulations, resistance to corrosion and many chemicals, lighter weight, integrated color without secondary finishing, and no sharp shavings in handling. Where structural strength or temperature resistance beyond a resin’s range is required, metal remains the correct answer.
The prototyping path is worth planning deliberately, because most projects use both processes in sequence. 3D printing and rapid prototyping let you hold and test a part before committing to a steel tool, and the fuller comparison is covered in this breakdown of 3D printing versus custom injection molding.
Advanced Injection Molding Techniques and Secondary Operations
Several techniques extend what a single molded part can do, and most of them reduce assembly steps later. They are worth knowing at the specification stage, because designing for them after tooling is cut is rarely possible.
Insert molding: resin is injected around a preplaced component, commonly a metal threaded insert, producing a single unified part rather than an assembly. It removes a fastening step and a failure point.
Overmolding: a second material is molded over a first, most often to add a soft-touch grip or to combine rigid and flexible zones in one piece. It is also used for appearance and for sealing.
In-mold labeling: graphics or labeling are applied during the molding cycle rather than as a separate decorating pass, which produces a finish that cannot peel or scuff off.
Heat staking and ultrasonic welding: two methods of joining molded components without fasteners or adhesives. Ultrasonic welding uses high-frequency vibration to fuse parts at the joint.
Designing for Part Strength: Wall Thickness, Ribs, and Resin Grade
Durability is designed into a molded part well before production, and three levers do most of the work. They trade against each other on cost, so they are worth deciding deliberately rather than defaulting to the heaviest option.
Wall thickness: thicker walls produce a more durable part, but they cost more on both counts that matter. They consume more material and they lengthen cycle time, because cooling is the longest stage and thick sections cool slowly.
Ribs: adding ribs in the areas that actually carry load delivers extra strength where it is needed without thickening the whole part. This is usually the cheaper route to the same durability.
Resin grade: engineering-grade resins withstand extreme temperatures, friction, and corrosion, which makes parts molded from them more durable than commodity-grade equivalents. Parts that last longer also get replaced less often, which reduces waste across the life of the product.
Material efficiency is a quiet advantage of the process itself. When a part comes out broken or unusable, the plastic can generally be reground and remelted into another cycle rather than scrapped.
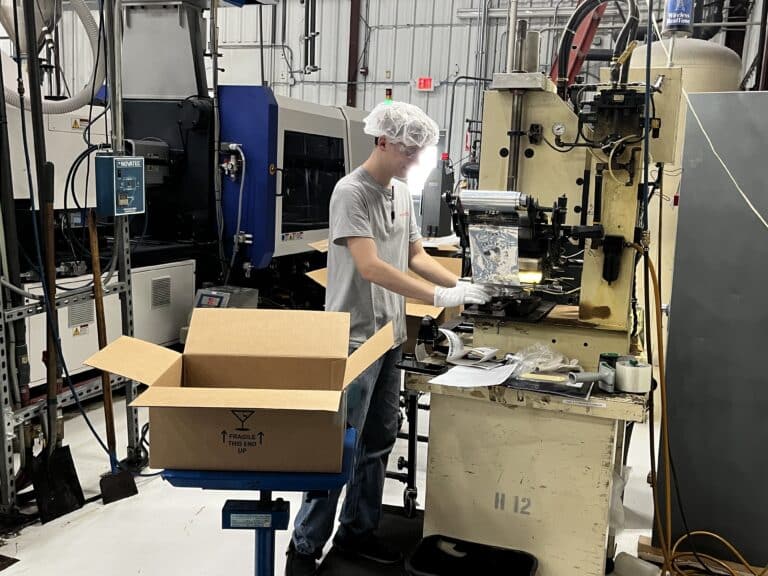
Finishing is the step buyers most often forget to price. Decoration and assembly frequently get outsourced to a second vendor, which adds freight, lead time, and another quality handoff. Pioneer Plastics keeps most of those operations in house, including 1000 watt ultrasonic welders, hot stamp machines, a heat transfer machine, a pad printer, a blister pack machine, bagging machines, and a shrink wrap machine, so most parts go from press to packaged in one place. Some specialized printing is sent out.
Industries That Rely on Injection Molding
Injection molding shows up anywhere a business needs consistent plastic parts in quantity. The applications differ mainly in what the resin has to tolerate and what regulatory requirements apply.
Food service and food packaging: containers, trays, and preparation tools made from food-grade resins that are non-reactive and cleared for contact. Published clients in this space include Pizza Hut, Panera Bread, World’s Finest Chocolates, and Kelley Bee.
Home and industrial appliance: housings, small components, and short-run replacement parts, an area where a domestic molder’s responsiveness matters more than unit price. Published clients include Whirlpool and GE.
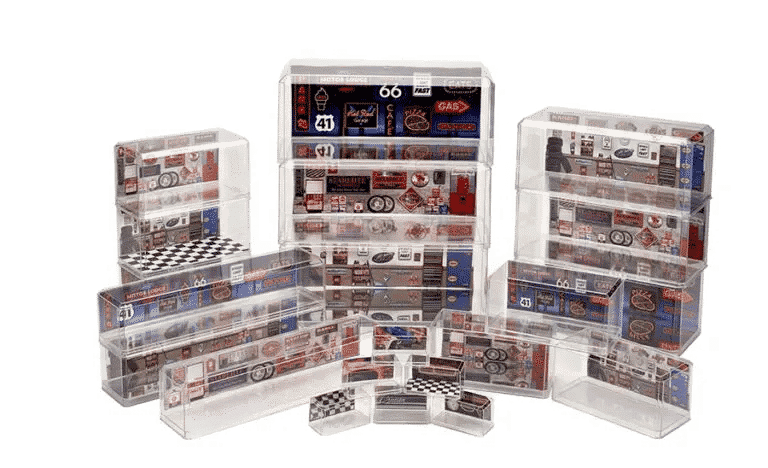
Collectibles and memorabilia: display cases and clear containers produced at retail volume, including work for Hobby Lobby.
Government and defense: contract work that requires supplier registration. Pioneer Plastics holds CAGE Code 3U4K8, which enables direct work with federal, state, and local agencies.
Storage and organization: containers and cases where dimensional consistency and stackability are the functional requirements.
A fuller breakdown of applications by sector is available on the industries served page.
From Concept to Production: How an Injection Molding Project Runs
A first injection molding project generally moves through six stages. Knowing the sequence makes it easier to see where costs and delays actually accumulate.
Design and manufacturability review. The part is assessed for wall thickness, draft, ribbing, and gate placement. Changes made here cost nothing compared with changes made later.
Prototyping. A physical part is produced, usually by 3D printing, so form and fit can be validated before any steel is cut. Pioneer Plastics does this in house and uses printed production runs to prove a design before committing to a mold.
Tooling. The mold is designed and built to the frozen design. This is the longest and most expensive single stage.
Sampling and first article inspection. Initial parts are run and measured against specification, and the tool is adjusted as needed.
Production. Full runs are scheduled, with quality control through the run. An ISO 9001:2015 certified quality system is what makes part-to-part consistency auditable rather than assumed.
Secondary operations and fulfillment. Decoration, assembly, and packaging are completed, and the tool is maintained and stored for the next run.
Frequently Asked Questions About the Injection Molding Process
How much does an injection mold cost?
There is no useful universal figure, because mold cost is driven by size, geometric complexity, cavity count, steel grade, and expected production life. A simple single-cavity tool and a large multi-cavity production tool can differ by more than an order of magnitude. The only reliable number comes from a quote against your actual geometry and annual volume, which is why molders ask for a model or drawing before pricing anything. You can start that conversation here.
What is the minimum order quantity for injection molding?
There is no fixed industry minimum, but the economics set a practical floor. An initial order of a thousand units or fewer is usually not a good fit for the process, because tooling cost dominates at that scale. For size alterations to an existing Pioneer Plastics product, the threshold is explicit: 50,000 units or more annually, which is the volume that justifies building a new mold.
Is injection molding better than 3D printing?
Neither is better in the abstract; they solve different problems. 3D printing is faster and cheaper with no tooling required, which makes it the right tool for prototypes and small runs. Injection molding costs more to start and then produces parts at a lower unit cost with tighter repeatability, which makes it the right tool at volume. Most successful projects use printing to validate the design and molding to produce it.
How long does it take to get parts from a new mold?
The tooling build dominates the schedule on any first run, well ahead of the production time itself. The honest answer depends on tool complexity, cavity count, and whether the design is truly finalized, so a molder should commit to a specific timeline before the project starts rather than estimating loosely. Late design changes are the most common cause of a timeline slipping.
Can an existing mold be moved to a different molder?
Yes. An incoming molder can inspect, service, and requalify an existing tool before running production with it, though refurbishment is sometimes needed if the tool has been run hard or stored poorly. Ownership terms vary by contract, so confirm who owns the tool before initiating a transfer. More answers are collected on the Pioneer Plastics FAQ page.
Getting Your Injection Molding Project Started
The injection molding process rewards preparation. A validated design, a realistic annual volume, and an honest assessment of whether molding is even the right process will save more money than any negotiation over unit price. Pioneer Plastics is a veteran-owned, family-owned manufacturer in Dixon, Kentucky, ISO 9001:2015 certified, producing parts in the USA for more than 40 years.
The information provided in this content is for general informational purposes only and should not be considered professional advice. It is advisable to consult with a qualified industry professional before taking any action based on this information. The team at Pioneer Plastics is here to assist you with any questions you may have.
In many large-scale purchasing scenarios, wholesale display cases offer significant advantages for business-to-business (B2B) buyers. From reducing per-unit costs to streamlining supply chain operations, bulk
In the intricate dance of form and function that characterizes plastic injection molding, hot stamping emerges as a pivotal step, where aesthetic appeal meets durability.