The Injection Mold Sampling Process: From CAD File to First Shot
A finalized part design is a promise on paper. The injection mold sampling process is where that promise gets tested in steel and plastic, when the first shots come off a brand-new tool and reveal whether the part will actually mold the way the design says it should. This guide picks up where the design review ends, walks through the mold build, and explains how trial shots catch problems before they ever reach a production run.
Key Takeaways
Sampling proves a new mold before production: the injection mold sampling process is the series of trial runs, starting with the first shot, used to confirm a new mold produces correct parts before full production begins.
Sampling moves through stages (T0, T1, T2): T0 is the rough first shot that proves the tool runs, T1 is the first formal sampling run measured against the print, and T2 confirms that corrections worked.
The first shot catches problems on the bench, not mid-production: trials surface parts that will not eject, cavities that fill out of balance, unexpected clamp tonnage, and cycle times longer than the simulation predicted.
T1 drives first article inspection: parts are measured against the CAD and engineering print to validate dimensions, fit, and finish before the tool is approved for production.
Getting the tool right protects cost: because mold design largely determines cycle time and labor, a clean sampling phase protects both part quality and the per-part economics quoted at the start of the job.
What Is Injection Mold Sampling?
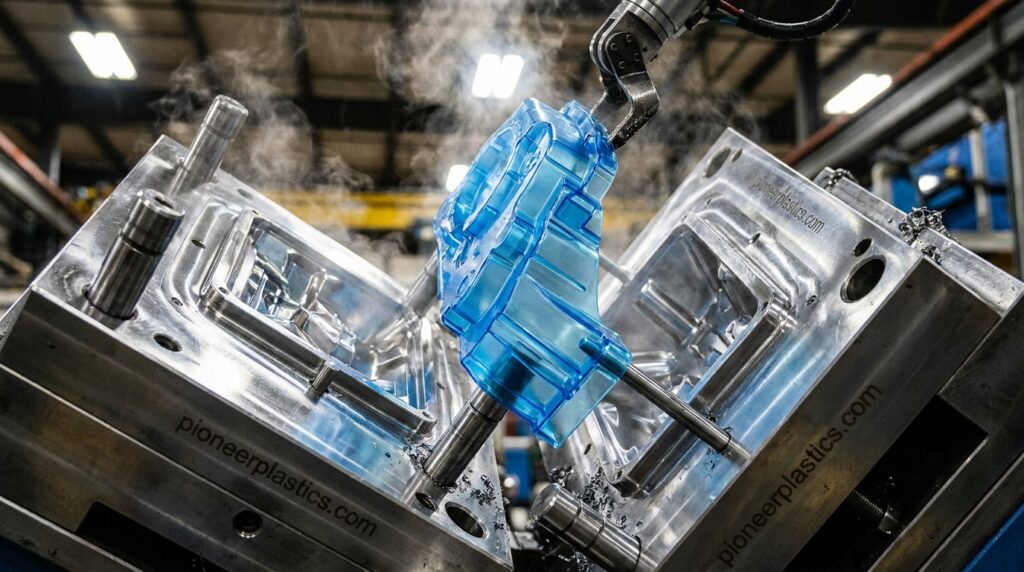
Injection mold sampling is the process of running a newly built mold to produce trial parts, then inspecting those parts to confirm the tool makes correct components before committing to full production. The very first parts off the tool are called the first shot.
Sampling sits between tooling and production. It is the moment a design becomes reality. Everything sampling reveals traces back to how the part was designed and how the mold was built.
From a Finalized Design to a Finished Mold: The Build Phase
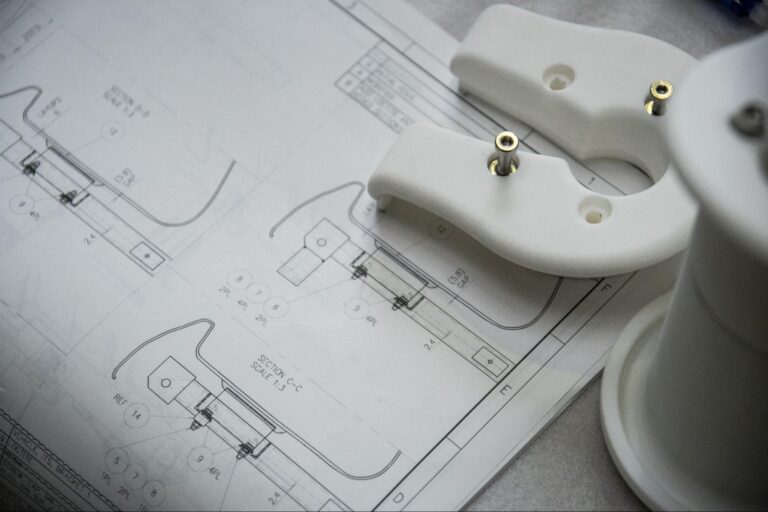
After the design is locked, the mold itself has to be built, and that build determines almost everything sampling will later reveal. It starts with a finalized CAD file and ends with a precision steel tool ready for its first run.
A production mold build generally involves four stages:
Steel selection: choosing tool steel grades based on the expected production volume and the resin being molded.
Machining the cavity and core: cutting the part geometry into steel using CNC machining and EDM to hit tight tolerances.
Cooling, ejection, and runner systems: adding water lines, ejector pins, and the runner and gate system (or a hot runner manifold) that feeds and releases the part.
Assembly and fitting: assembling the mold base, plates, and components, then fitting and finishing the surfaces.
At Pioneer Plastics, in-house engineers manage the entire mold build with trusted tooling partners, whether the job calls for a brand-new custom tool, a transferred tool, or maintenance on existing tooling. With ISO 9001:2015 certification and more than 200 years of combined engineering experience on the floor, the build is treated as the foundation that sampling will test. For lower-risk validation before committing to a production tool, some projects begin with rapid prototyping.
Getting the tool right matters because domestic molders work with a thin margin for error. US plastics product manufacturing ran at about 73.4% average capacity utilization in 2025 (down from a 75.0% monthly average in 2024, with December projected at 72.5%), which leaves little slack to absorb the rework a missed sampling step can create.
What Are the Stages of Injection Mold Sampling? (T0, T1, T2)
Injection mold sampling usually moves through three stages, commonly labeled T0, T1, and T2 (the “T” stands for trial). Each run produces parts, but each has a different job: prove the tool runs, prove the parts measure correctly, then confirm the corrections. Naming varies from shop to shop, so confirm the convention with your molder.
Stage
What happens
What it catches
T0 (first shot)
The mold runs for the very first time, often before final texturing or polishing. The goal is simply to confirm the tool fills and parts release.
Short shots, sticking, ejection failures, flash, and gate or runner problems.
T1 (first sampling run)
The near-complete tool runs under controlled conditions to produce representative parts for measurement and first article inspection.
A follow-up run after T1 corrections are made to the tool or process, confirming the fixes worked.
Residual dimensional drift, cooling or cycle-time issues, and anything not fully resolved at T1.
Programs with complex tooling sometimes add a T3 or more rounds when corrections are extensive, but the goal is always the same: reach a repeatable process that produces in-spec parts.
What the First Shot Catches Before It Reaches Production
The value of the first shot is catching expensive problems on the trial bench instead of in a production run of tens of thousands of parts. A trial surfaces issues that no amount of on-screen review can predict, which is exactly why a hands-on tryout exists. The most common problems a first shot reveals include:
Parts that will not eject: a four-inch-tall part can refuse to release if the press offers only three and a half inches of ejector stroke, a clash between part height and machine stroke that only appears when steel meets the press.
Hot runner zones that confuse startup: as the tool heats, the zones that warm slowly are usually the manifold and the zones that warm quickly are the cavities, which prevents technicians from adjusting the wrong zone.
Cavities that fill out of balance: in multi-cavity tools, balance is corrected by adjusting individual runner diameters rather than gate sizes, because resizing gates causes packing and warping problems.
More clamp tonnage than predicted: a part may need more clamp force than the mold-filling analysis estimated, forcing a flash-versus-sink trade-off and sometimes a move to a larger press across the available 75-ton to 1200 -ton range.
Cycle times longer than the simulation: actual cycle time at sample can exceed the estimated cycle time when cooling is inadequate, which directly affects per-part cost.
Seasoned molders point out that few design checklists actually target the problems that first surface at sampling. That gap is the reason a physical trial protects the customer: the issues get found and fixed before a single production lot is committed.
Why T1 Samples Matter for Mold Validation
T1 samples matter because they are the first parts measured against the engineering print, turning a tool that runs into a tool that is proven. This is where first article inspection happens and where a part earns approval for production.
During T1, parts are checked for dimensional accuracy, fit, and surface finish, and the results drive any tooling or process corrections. Tying this run to a documented quality control and inspection process is what separates a part that looks right from one that is verified right.
Validation also protects the numbers quoted at the start of a job. Molders typically quote on six primary factors: part weight, material cost, machine size, cycle time, labor, and packaging. Mold design controls three of them, so a tool that samples cleanly protects both quality and the per-part economics. Pioneer Plastics documents this kind of build-to-validation work in its published case studies.
Frequently Asked Questions About the Injection Mold Sampling Process
What is a T0 sample?
A T0 sample is the very first shot taken from a new mold, often before final texturing or polishing. Its purpose is to confirm the tool fills and parts eject, not to produce finished, in-spec parts. Think of it as proving the mold works mechanically before anyone measures the results.
What is the difference between T0 and T1 samples?
The difference is purpose and maturity. T0 is the rough first run that proves the mold functions, while T1 is the first formal sampling run on a near-complete tool that produces representative parts. T1 parts are measured against the print for approval; T0 parts usually are not.
How long does the injection mold sampling process take?
It varies with part complexity, the number of cavities, and how many corrections the tool needs. The mold build itself commonly takes several weeks to a few months, and the sampling cycle from first shot to approval can add a few more weeks. Tools that need multiple trial rounds take longer, which is why thorough design review up front shortens the schedule.
Can a mold still be changed after the first shot?
Yes, and that is the entire point of sampling. Trial shots are meant to reveal what needs adjusting, and many corrections are routine before approval. Steel-safe changes that add material are simpler than changes that require welding or recutting steel, which is why locking the design before the tool is cut matters so much.
Build It Right Before Production Scales
The injection mold sampling process is where good design and good tooling prove themselves, one trial shot at a time. As a US, ISO 9001:2015 certified, family-owned and veteran-owned molder with in-house tool development, Pioneer Plastics builds, samples, and validates tools so parts are right before production scales. Ready to move a concept from CAD file to first shot? Request a fast quote and get a clear timeline up front.
The information provided in this content is for general informational purposes only and should not be considered professional advice. It is advisable to consult with a qualified industry professional before taking any action based on this information. The team at Pioneer Plastics is here to assist you with any questions you may have.
In today’s fiercely competitive retail environment, honey producers face a persistent challenge: capturing the attention of retail buyers amid crowded shelves loaded with condiments, natural
Sustainability in injection molding is no longer a buzzword; a fundamental pillar of modern manufacturing. Driven by Environmental, Social, and Governance (ESG) goals and the
Plastic injection molding is a popular manufacturing method used to produce a wide variety of products across industries. From consumer goods to industrial components, the