Injection Mold Tool Transfer: How to Relocate Your Mold Without Losing Production
Moving an existing mold from one molder to another is a high-stakes decision, and the worry is always the same: lost production and a damaged tool. A well-run injection mold tool transfer protects both. This guide covers what to confirm before you move, the step-by-step process, the risks worth planning for, and what to look for in a domestic transfer partner.
Key Takeaways
An injection mold tool transfer is the process of moving an existing mold from one manufacturer to another and validating it to run in the new facility. It is not a new tool build.
The two biggest risks are production downtime and tool damage. Both are manageable with a documented plan, a pre-move audit, and buffer stock built before the mold ships.
Complete documentation (CAD files, mold history, processing parameters, and clear IP ownership) is the single biggest predictor of a smooth transfer.
Press compatibility matters. A mold must be matched to a machine with the right tonnage, shot size, and ejector stroke, or the first samples will fail.
A domestic partner with in-house tooling and engineering can audit, repair, validate, and run a transferred mold under one roof.
What Is an Injection Mold Tool Transfer?
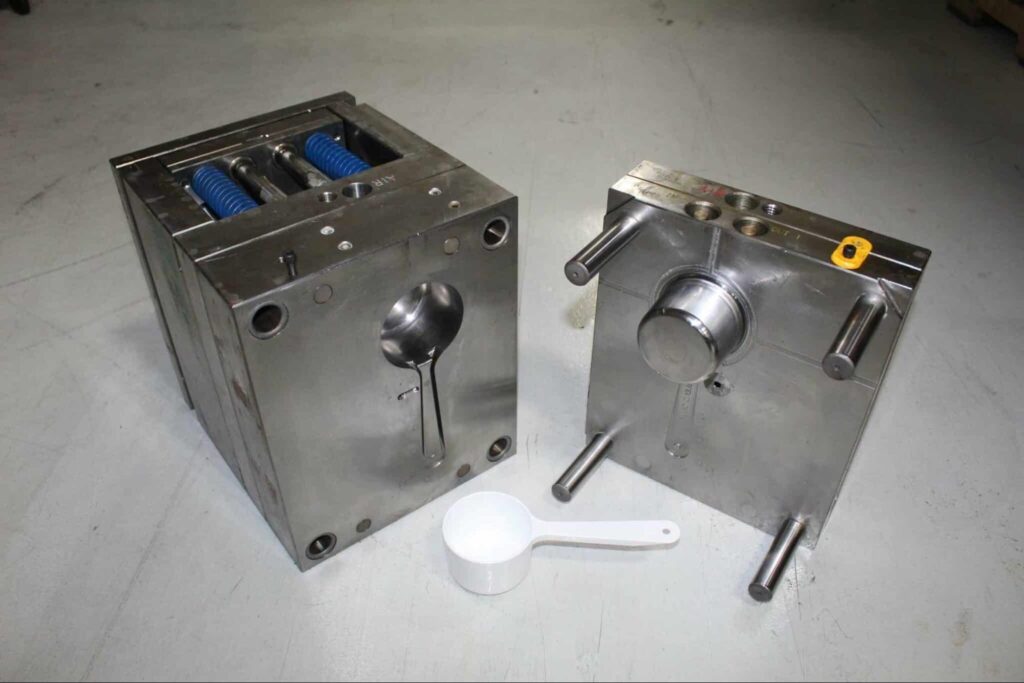
An injection mold tool transfer is the process of physically relocating an existing mold from one molder to another, then validating it so it produces good parts in the new facility. It is not a new tool build. The expensive part, the mold itself, already exists, so the work is about moving it safely, confirming its condition, and dialing in production on a new press.
Companies transfer tooling for many reasons. A current molder is underperforming, a contract is ending, a shop has closed or been acquired, or a buyer is bringing production back to the United States. Whatever the trigger, the goal is the same: continuity of supply with no drop in quality.
Reshoring and tariffs: Higher tariffs and shipping uncertainty change the total landed cost math, and moving an existing mold to a US molder is the fastest way to localize without paying for a new tool. The trade-offs between domestic and overseas tooling are covered in our look at American versus overseas mold makers.
Vendor performance problems: Missed deadlines, quality slips, or poor communication push buyers to find a more reliable molder.
Supplier disruption: When a molder closes, is acquired, or exits a product line, the tooling has to find a new home quickly to keep production running.
Supply chain resilience: Some manufacturers move or add a second source proactively to reduce the risk of a single point of failure.
What to Confirm Before You Transfer a Mold
Before moving a mold, confirm five things: the mold’s condition, complete documentation, intellectual property ownership, press compatibility at the new shop, and a production timeline with buffer stock. Getting these right up front prevents most transfer failures.
Mold condition: Request a current inspection or recent sampling records. A worn or damaged tool may need refurbishment before it can run reliably.
Documentation and CAD data: Gather the mold design files, 2D and 3D CAD models, material specs, processing parameters, and maintenance history.
Intellectual property and ownership: Confirm in writing that you own the mold and the associated data, and that the outgoing molder will release everything, including design files and any hot runner controllers.
Press compatibility: Verify the receiving shop has a machine that matches the mold’s tonnage, shot size, and ejector stroke.
Timeline and buffer stock: Build enough finished inventory to cover the transfer window so a single hiccup does not stop your line.
The Injection Mold Tool Transfer Process, Step by Step
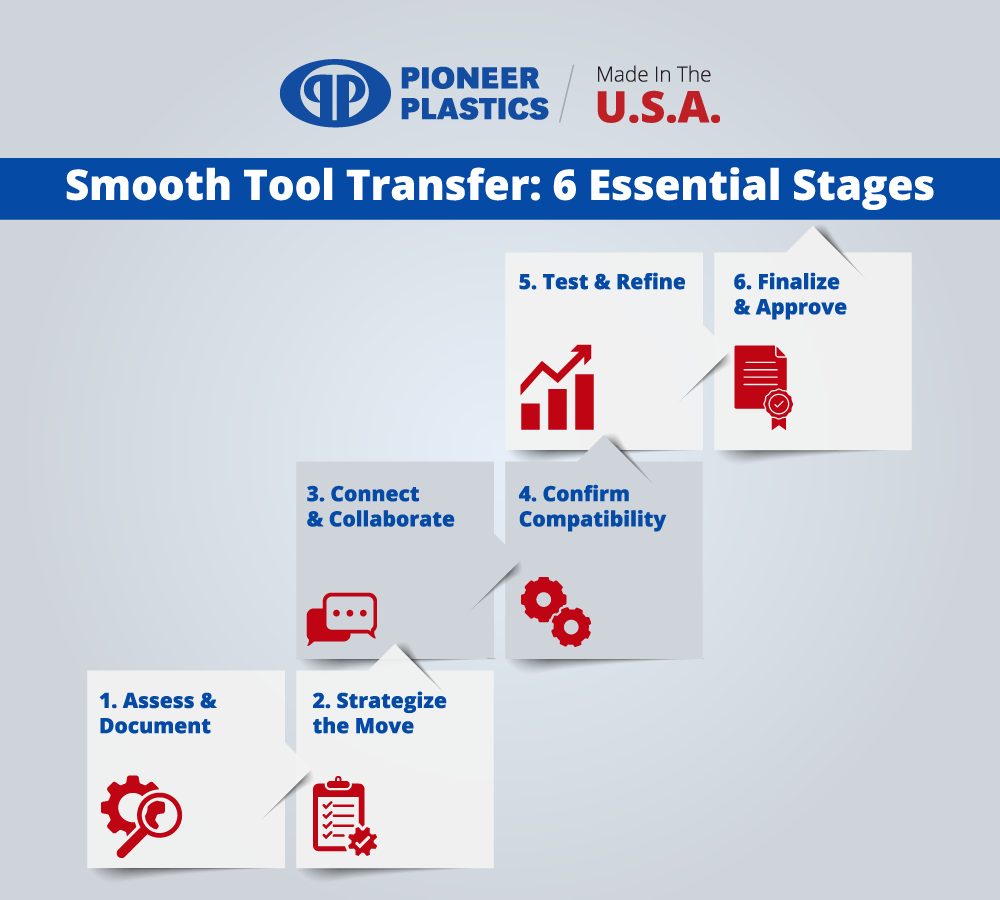
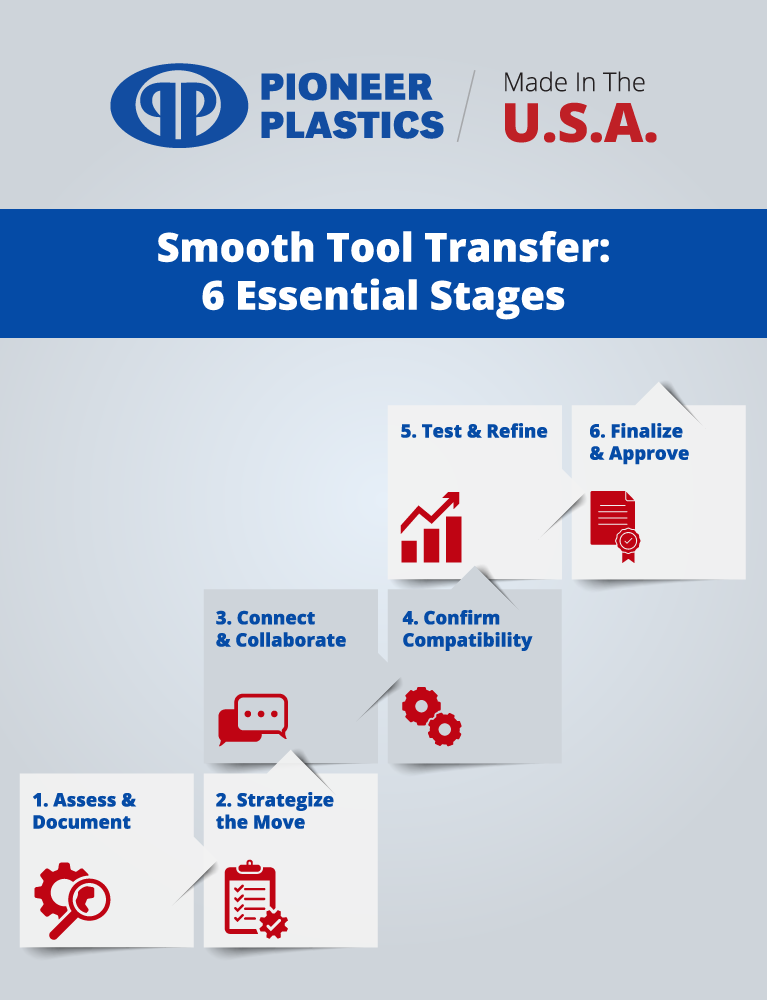
A tool transfer follows a repeatable sequence: audit the mold, build a transfer plan, move the tool, validate it with sample shots, and sign off on approved parts. Each step has a checkpoint that protects quality and schedule.
Audit the tool: The receiving molder inspects the mold, documents its condition, and flags any repairs needed before it runs. In-house engineering support makes this assessment faster and more reliable.
Build the transfer plan: Map responsibilities, timing, shipping, and a first-sample date so everyone works from the same schedule.
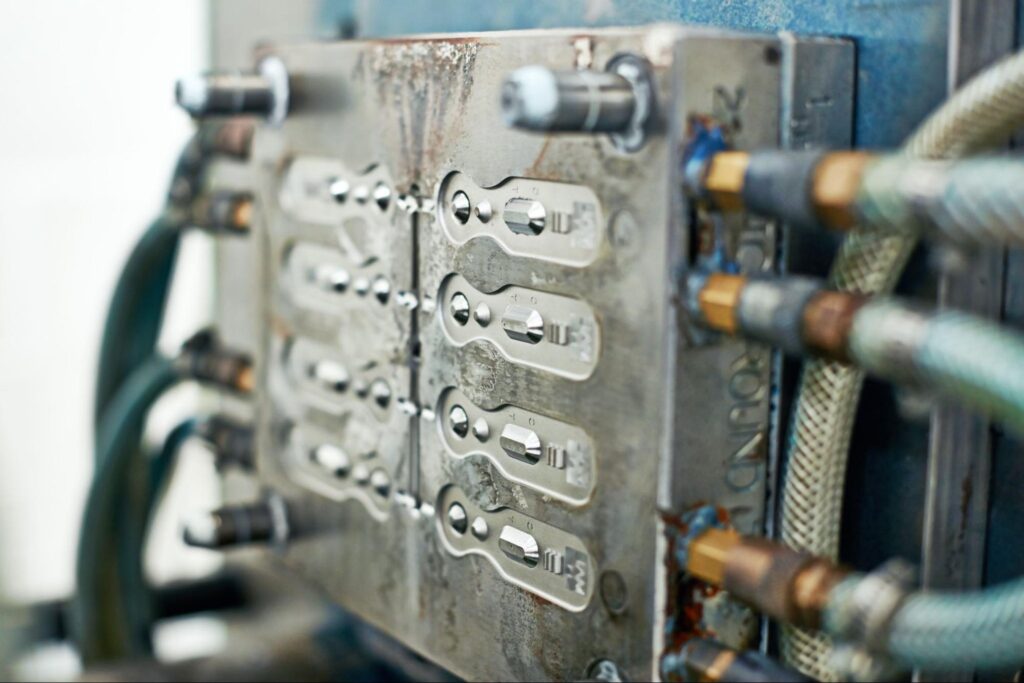
Move the mold: Crate and ship the tool with care, protecting parting lines, cores, and any electrical or hydraulic connections.
Validate with sample shots: Run first samples (a mold trial) on the matched press, then measure parts against the print before committing to a full production run.
Approve and document: Compare validated samples to your quality requirements, sign off, and lock in the production process so future runs are repeatable.
Common Tool Transfer Risks and How to Avoid Them
The most common tool transfer risks are physical damage in transit, incomplete documentation, production downtime, process variation on a new press, and compliance gaps. Each one is preventable with planning.
Transit damage: Professional crating and handling, plus a pre-shipment and post-arrival inspection, protect the tool and create a record if anything shifts during the move.
Incomplete documentation: Insist on full design files, processing data, and maintenance history before the mold moves. Missing data forces guesswork and slows the restart.
Production downtime: Buffer stock and a realistic first-sample date keep your line supplied while the mold is in transit and being validated.
Process variation: A different press and different ambient conditions can shift part dimensions. Mold trials and process validation catch this before it reaches production.
Compliance and regulatory gaps: For regulated parts, confirm the receiving molder can meet the standards your product requires. Pioneer Plastics is certified to the ISO 9001 quality management standard and holds CAGE Code 3U4K8 for government and defense work.
Choosing a Domestic Tool Transfer Partner
The right transfer partner can audit, repair, validate, and run your mold in-house, so the tool never leaves a single accountable team. Look for in-house tooling and engineering, the right press range, a documented validation process, and a track record of long-term customer relationships.
In-house tooling and engineering: A molder that manages mold build and maintenance in-house can service or refurbish your tool without sending it out. Pioneer Plastics handles tool development and management under one roof, backed by 200+ years of combined engineering experience.
A matched press range: Pioneer Plastics runs 22 injection molding machines from 75-ton to 880-ton, detailed on its facilities and equipment page, which makes it easier to match your mold to the right machine.
A documented validation process: Ask how the molder validates a transferred tool before production. A clear sampling and sign-off process is the difference between a smooth start and a scramble.
A proven track record: Look for documented project work and long client relationships. Pioneer Plastics has client relationships spanning 20 to 30 years and publishes case studies of real manufacturing projects.
Frequently Asked Questions About Injection Mold Tool Transfers
How long does an injection mold tool transfer take?
Most transfers take a few weeks to a few months, depending on the mold’s condition, how complete the documentation is, and whether the tool needs repair before it can run. Building buffer stock before the move covers this window so production does not stop.
Will my mold be damaged during the transfer?
Not with proper handling. Professional crating, protected parting lines and cores, and a pre-shipment plus post-arrival inspection protect the tool and document its condition at each step. A careful transfer treats the mold as the high-value asset it is.
Who owns the mold and the tooling data?
In most cases the customer who paid for the mold owns it, along with the design files and processing data. Confirm ownership in writing before the transfer, and make sure the outgoing molder agrees to release the tool, the CAD files, and any controllers.
Can I transfer a mold from an overseas molder to a US molder?
Yes. Reshoring an existing mold to a US molder is one of the most common transfer scenarios, and it avoids the cost of building a new tool. The main requirements are clear ownership, complete documentation, and a domestic shop with a compatible press.
What documentation do I need for a tool transfer?
At a minimum, you need the mold design and CAD files, material and resin specifications, processing parameters, and the mold’s maintenance and sampling history. The more complete the records, the faster and safer the transfer.
Move Your Mold With Confidence
A successful injection mold tool transfer comes down to preparation, complete documentation, and a partner who can manage the whole move in-house. If you are planning to relocate a mold or bring production back to the United States, request a quote from Pioneer Plastics and get a clear transfer timeline upfront.
The information provided in this content is for general informational purposes only and should not be considered professional advice. It is advisable to consult with a qualified industry professional before taking any action based on this information. The team at Pioneer Plastics is here to assist you with any questions you may have.
Pioneer Plastics, a leader in the plastic injection molding industry, recently undertook a project that showcased their innovative problem-solving abilities. A prominent supplier of construction
High impact polystyrene is a well-known type of thermoplastic favored in injection molding scenarios across a variety of industries. Its unique blend of durability, texture,
Bees are an important insect vital to ecosystems throughout the world. They help to pollinate, to spread plants and ensure their wellbeing, and contribute to